Beginner Series
What Makes a Curve and Why It Matters
'Mana curve' isn't jargon for its own sake. It's the shape of your deck's cost distribution, and it decides whether you have something to do on turn 2 or you're stuck holding a hand of 6-drops.
Jump to section ▾
The basics
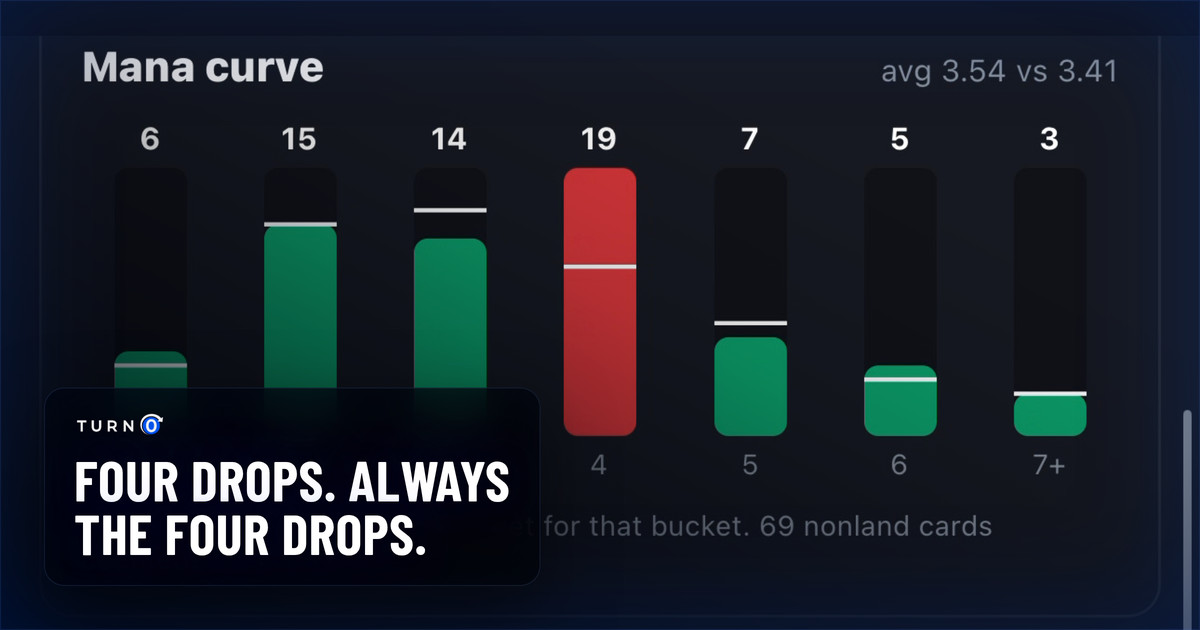
A mana curve is just a chart of how many cards in your deck cost 1 mana, 2 mana, 3 mana, and so on. Plot it out, and a healthy deck usually looks like a hill: fewer cheap cards, a peak somewhere in the middle, and fewer expensive cards tapering off at the top.
The reason it matters: you gain exactly one land drop per turn. A deck with too many expensive cards will sit doing nothing early, and a deck with nothing expensive runs out of gas late. The curve is how you make sure you have something worth doing on every turn of the game, not just some of them.
A deck full of powerful 6-mana spells doesn't feel powerful if you're dead on turn 5 because you never got to cast anything.
the practical argument for curve discipline
The official rule
"Curve" itself is a strategy term, not a rules term, but it's built entirely on "mana value," which is defined in rule 202.3.
Comprehensive Rules · Rule 202.3
"The mana value of an object is a number equal to the total amount of mana in its mana cost, regardless of color." Example: A mana cost of {3}{U}{U} translates to a mana value of 5.
"Curve" simply means plotting your deck's cards by mana value on the x-axis and count on the y-axis. Nothing about it is enforced by the rules. It's purely a deckbuilding heuristic built on top of a defined rules term.
Examples
What a bad curve feels like at the table
Turns 1-3: you play a land each turn and pass, because your hand is full of 5- and 6-mana spells.
Turn 4-5: you finally cast something, but you're already behind on board against opponents who were doing things since turn 2.
The fix isn't "play worse cards." It's making sure enough of your deck's power is accessible in the 2-4 mana value range to actually reach your turn 6 plays.
How to take advantage of it
Count your curve before you count anything else. When evaluating a deck list, tallying mana values by count is one of the fastest ways to spot a structural problem before you've played a single game.
Ramp effectively lowers your curve. A ramp spell doesn't just accelerate you. It means your "expensive" cards effectively cost less in terms of turns, letting a deck run a slightly higher curve than it otherwise could.
Commander decks can run a bit higher than 60-card formats. With 40 starting life and a slower pace, Commander decks can support more top-end than a typical Standard deck, but the same principle holds: even a Commander deck wants plenty of playable turn 2-3 plays.
Cheap spells that replace themselves flatten the bottom of the curve. A one-mana spell that draws a card is a turn-one play that costs you nothing in cards, which is why decks short on early plays so often reach for them. Count them honestly though: they smooth the curve and they are card selection rather than card draw.
Curve considerations change by role. A control deck can run a higher curve since it's not trying to win fast; an aggressive deck wants its curve pushed as low as possible to apply pressure before opponents stabilize.
Cards & commanders that spotlight the curve
Low end: turns 1-2
Cheap, efficient plays that keep your curve from going cold early.
Curve-toppers that reward getting there
The payoff cards worth building the rest of your curve around reaching.
Curve-smoothing tools
Cards whose entire job is making an imperfect curve feel smooth in practice.
Commander spotlight
A commander that turns curve discipline into a repeatable engine.
Commander Spotlight
Trostani Discordant ↗
Enters at 4 mana value, pumps your whole board +1/+1, and immediately creates two lifelink tokens, a genuinely playable curve stop at four that contributes the turn it lands, rather than a do-nothing body waiting for a bigger payoff later.
Keep the table on the same page.
TurnZero HQ tracks life, turns, and moments so nobody's re-litigating what happened three plays ago.
Create Free Account